ERR_NETWORK_CHANGED is one of the most common errors which every Chrome users find when they are trying to visit a particular page and Chrome is unable to access the network. It generally means that your browser or internet connection is preventing you from loading this page.
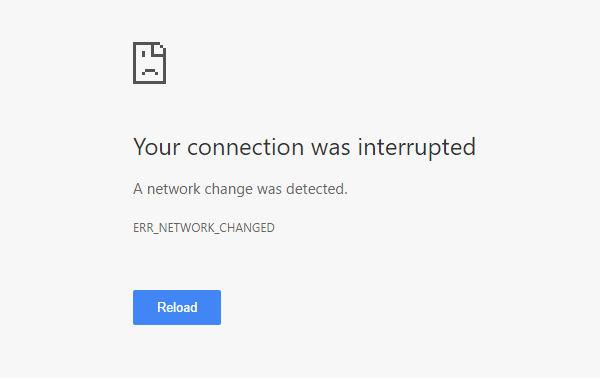
Many Windows 10 users have reported this error and they also see the message describing the error in the picture given below.
How to Fix ERR_NETWORK_CHANGED Error In Chrome?
To fix ERR_NETWORK_CHANGED error in Google Chrome we have effective and easy troubleshooting methods which will help you to solve your error easily.
Method 1: Clear Browsing Data in Google Chrome
Sometimes, it’s a corrupt cache that’s causing the error. In such situations, the best solution is to clear cookies and browser cache. So follow the steps to clear it
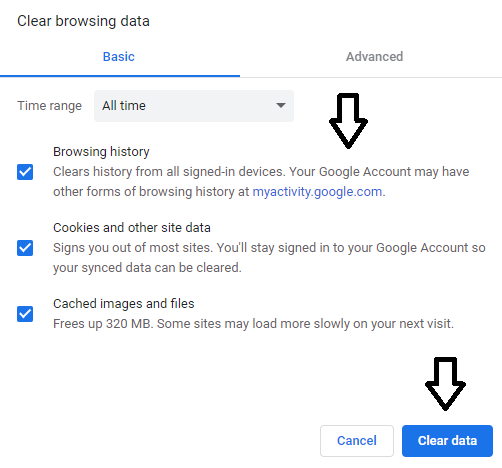
- Open your Google Chrome Browser
- Press Ctrl + Shift + Delete
- Set the time range to All time
- Now select the cookies and other sites data and cached and image files options
- Click on the Clear Data button to clear your browsers cookies and cache
- Lastly, try access to check if the issue is solved or not
Method 2: Reinstall your Network Adapter
Network adapters can sometimes be the cause of the ERR_NETWORK_CHANGED error on a PC running Windows
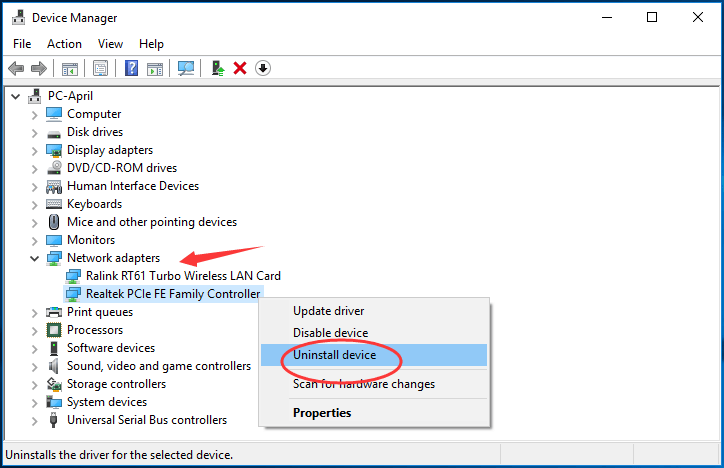
- Press Windows + R Hotkey and click on Device Manager
- Double-click on Network Adapters and right-click on your Network Adapter and click on Uninstall Device
- Lastly, restart your Windows 10, and Microsoft will reinstall your driver for you.
If you are not unable to conenct to your network then it means that the driver software isn’t automatically installed. So what you will do is:
- Click here to download your driver
- Install the driver and reboot your PC
Method 3 : Uncheck Proxy Server Options
It is also a good choice to ensure that you have unchecked Proxy server options when you encounter any issue. So here’s how to do it:
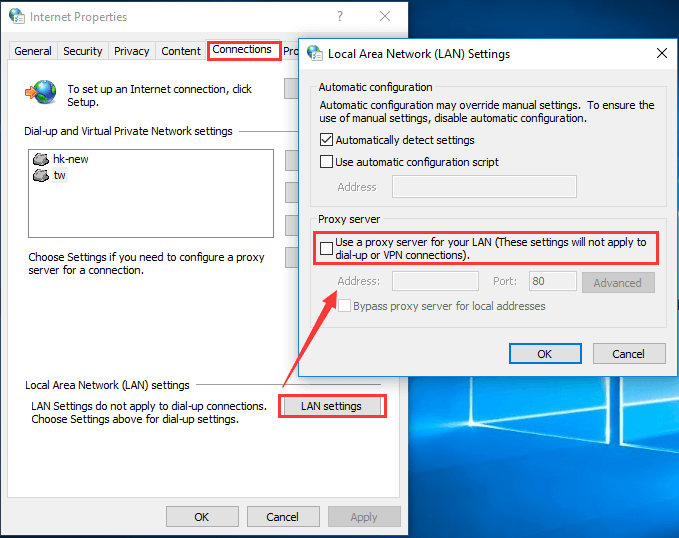
- Open Run window and type inetcpl.cpl
- Press Enter to run Internet Properties.
- Switch to the Connections tab and click LAN settings.
- In the pop-up window, make sure that Use a proxy server for your LAN is unchecked and click OK.
Method 4 : Use Google’s Public DNS
Using Google Public DNS means you are changing your DNS “switchboard” operator from your ISP to Google Public DNS. So follow the steps given-below in order to use it
- Go to search bar type Control Panel and click on it to open
- Open Control Panel and click on Network and Sharing Center option
- In the left-side of the window click on Change Adapter Settings
- Select your Wi-fi then double-click on it and choose Properties
- Now select Internet Protocol Version 4(TCP/Ipv4) and click on Properties
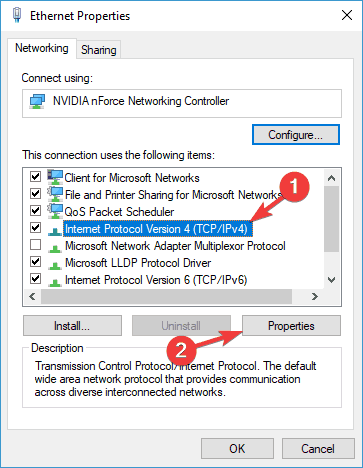
- Tick on “Use the following DNS server address” and type the following
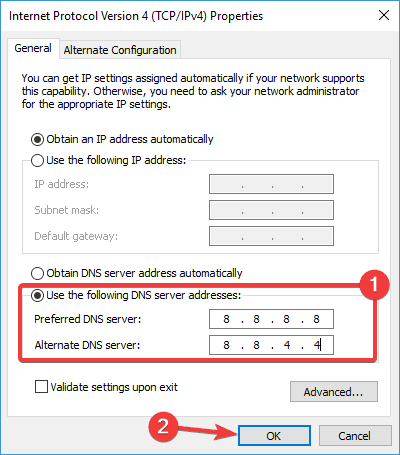
- Preferred DNS server: 8.8.8.8
- Alternate DNS server: 8.8.4.4
- Lastly, close everything and click on OK
Method 5 : Restart your Modem
If any of the above-given solutions does not resolve your error then all you can do is try to restart your modem or router to fix the error by following the steps given below
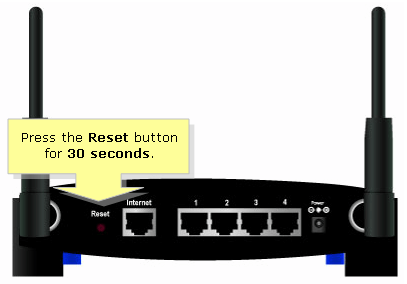
- Press the power button of your modem or router to power off,
- Then wait for a while
- Press the power button again to start it again.
Conclusion
So by following these 5 troubleshooting methods you can easily fix your ERR_NETWORK_CHANGED error easily without any trouble. Also if the problem still persists then comment below , we will be glad to help you out.

