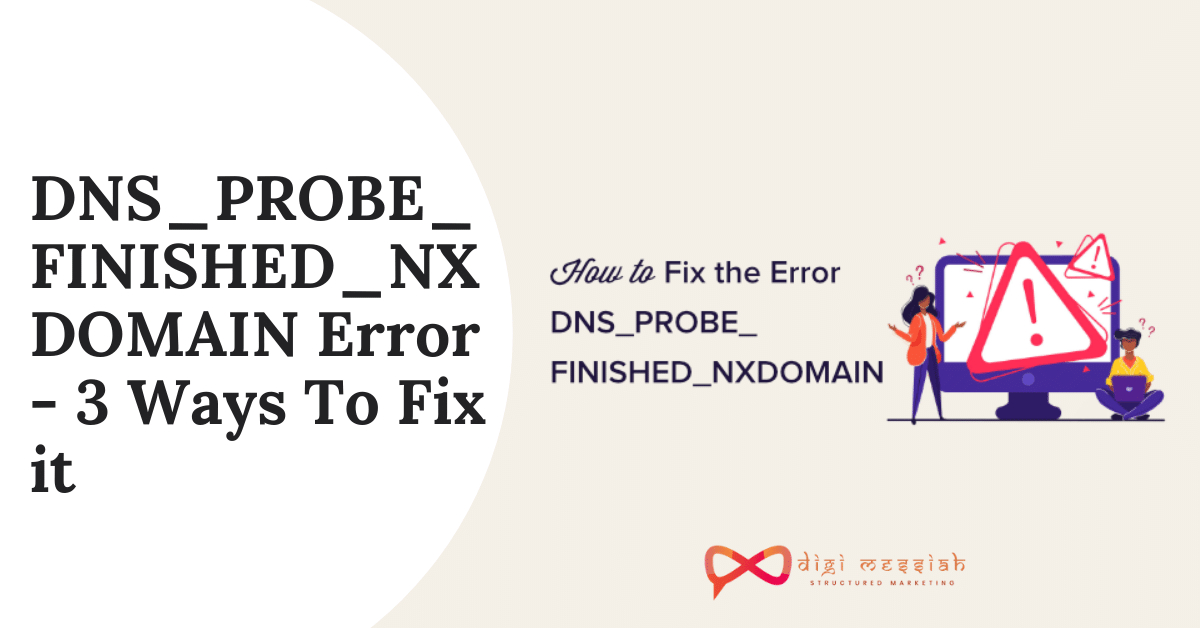
Sometimes when you browse in Google Chrome and type the site that you want to visit you see that your site is not opening and instead it says” This site can’t be reached”. So after going through the message, you find out DNS_PROBE_FINISHED_NXDOMAIN Error which is written at the end of the line
This Error is common for all the computer users and it seems multiple times while browsing through some sites. The message comes in an error form that does not allows users to go through the targeted site.
So in this article, I will be telling you what is DNS_PROBE_FINISHED_NXDOMAIN Error is all about and what are the best 3 Ways to fix this Error all it by yourself.
Click on the Below given links to find the solution if you are finding these type of errors in your Windows or MAC
What does DNS_PROBE_FINISHED_NXDOMAIN mean?
DNS_PROBE_FINISHED_NXDOMAIN is a mistake that advises about DNS query disappointment. It keeps individuals from arriving at wanted sites on the web and expresses “This webpage can’t be reached” or “This website isn’t accessible”. The issue, for the most part, troubles Google Chrome clients on Windows, Mac, or Android gadgets.
How to Fix DNS_PROBE_FINISHED_NXDOMAIN Error?
There are several easy to fix this but I have found out 3 Best Ways by which you can fix this error easily without having any trouble
- Release and Renew IP Address
- Change DNS Servers
- Reset Chrome Flags
1. Release and Renew IP Address
The first and most important thing you have to do is try to Release and Renew IP Address. This will smooth up your Local DNS Cache which is the same as Web Browser Cache.
Windows
- Press the Windows Logo Key along with the Letter ‘R’
- Type ‘CMD’ and click on ‘Enter’
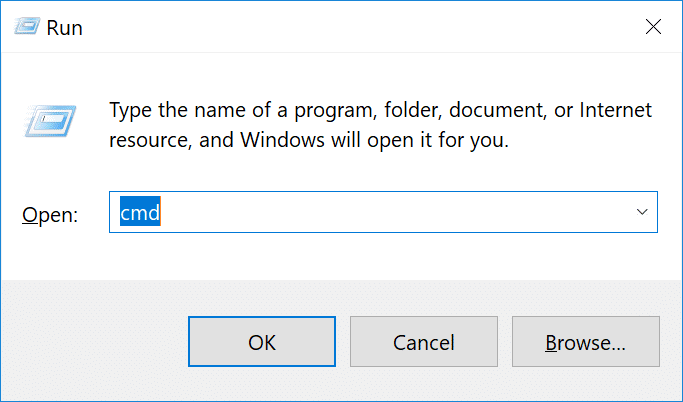
- Type
ipconfig/releaseand click ‘Enter’

- Then type
ipconfig/flushdns.This will flush your Local DNS Cache. You will see a ‘Successfully Flushed the DNS Resolver Cache’ message
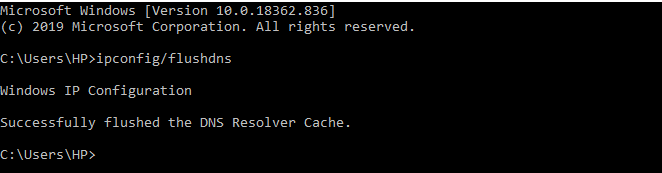
- Lastly, type
ipconfig/renewThis will renew your IP Address

MAC
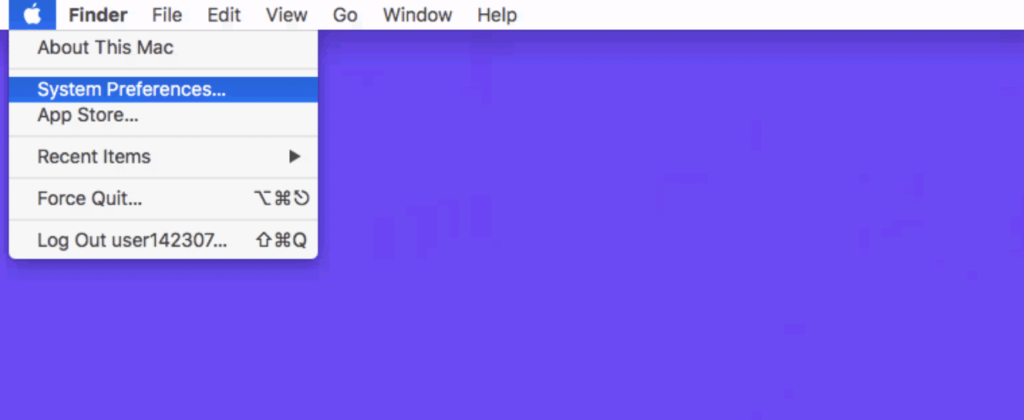
- Go to ‘System preference’
- Click on the ‘Network’ icon and click on ‘Advanced’
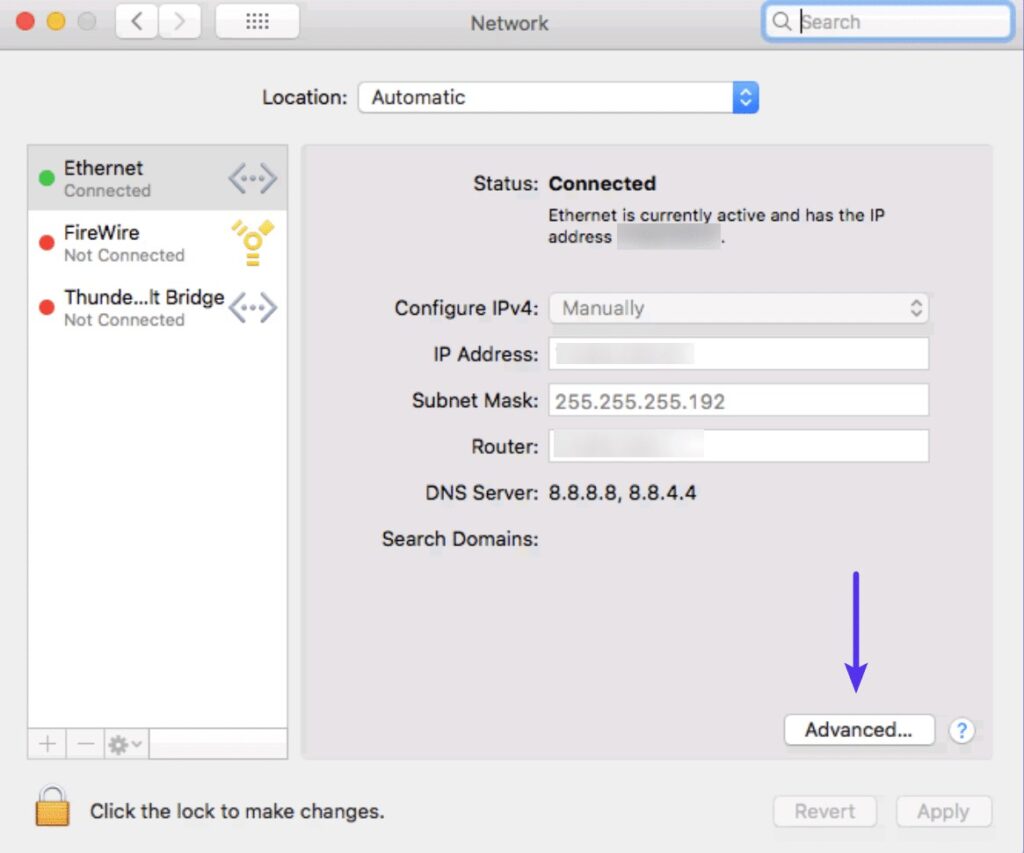
- Click the TCP/ICP Tab if you aren’t already in there
- Then click on the ‘Renew DHCP’ Button
However you can also clear the local DNS Cache through other method which is:
- Go to Utilities
- Click on ‘Terminal’
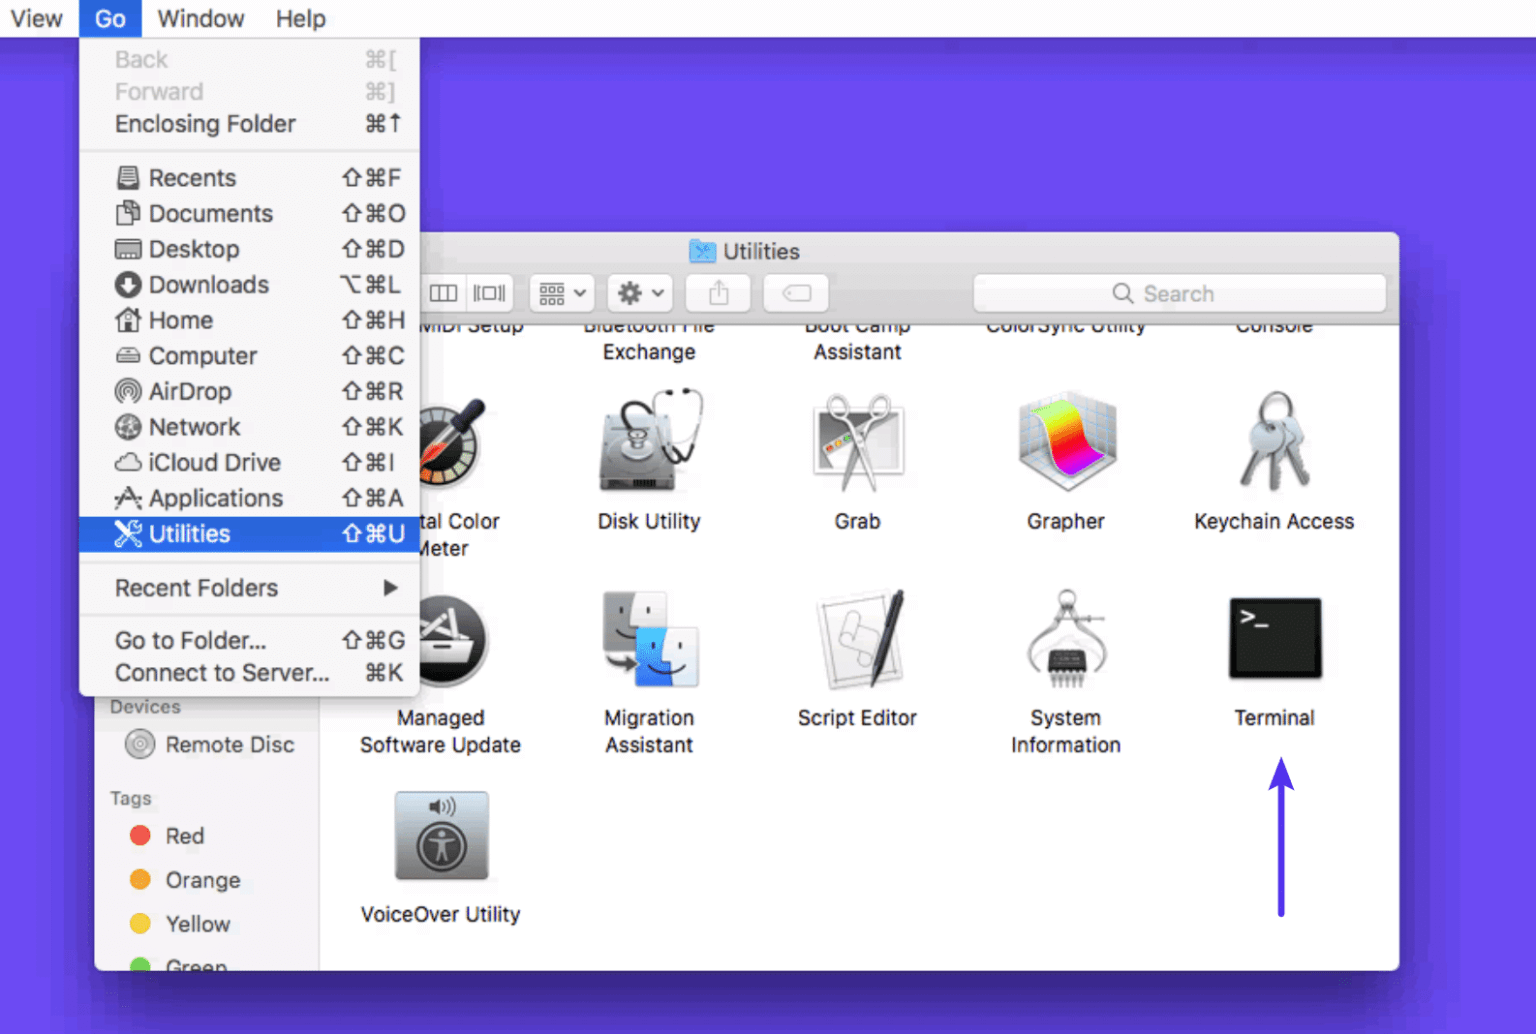
- Enter the following command –
sudo killall -HUP mDNSResponder; sleep 2;
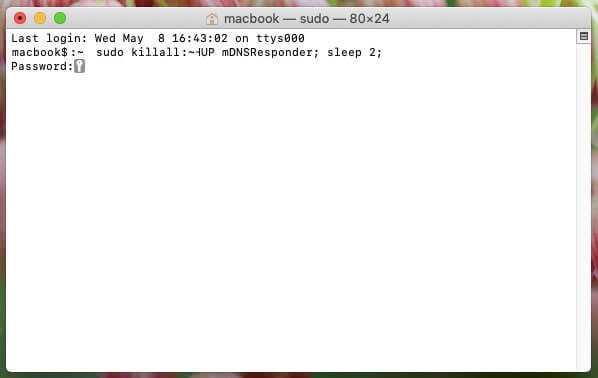
- Though there will no guarantee for clearing the DNS. But in most cases, it gets removed without any trouble
2. Change DNS Servers
The second thing you can do is Change the DNS Servers. The DNS Servers are usually supplied by the Internet Service Provider [ISP]. you can temporarily change your DNS Server to Public DNS Server through two popular Public DNS Server they are Google DNS and Cloudflare
Windows
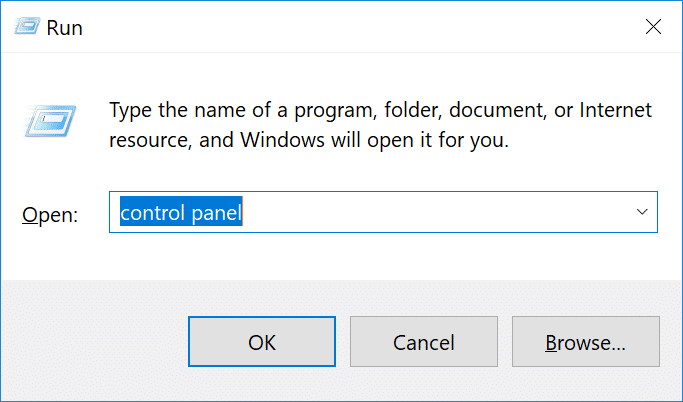
- Press the Windows Logo Key along with the Letter ‘R’
- Type ‘Control Panel’ and click ‘Enter’
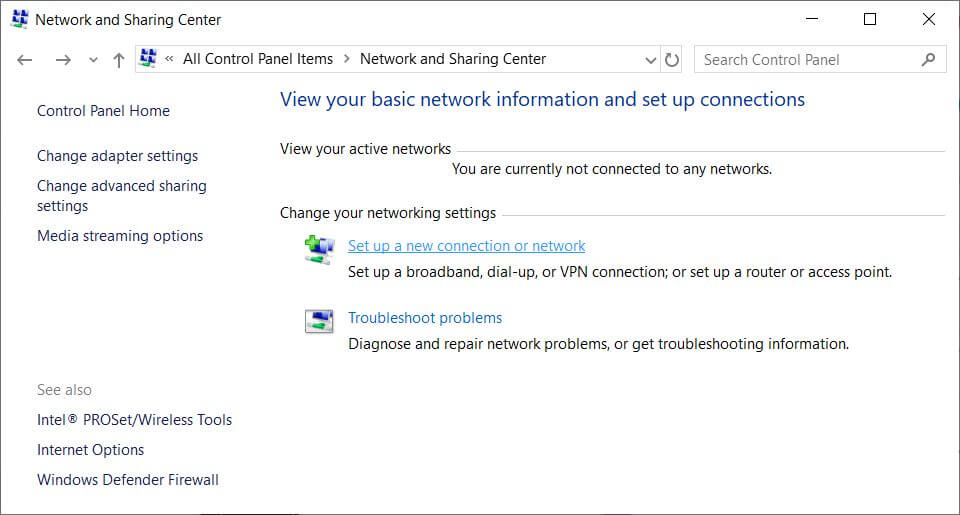
- Now Click on ‘Network and Internet’ > ‘Network Sharing Center’
- Click on ‘Change Adapter Settings’ on the Left-Hand side
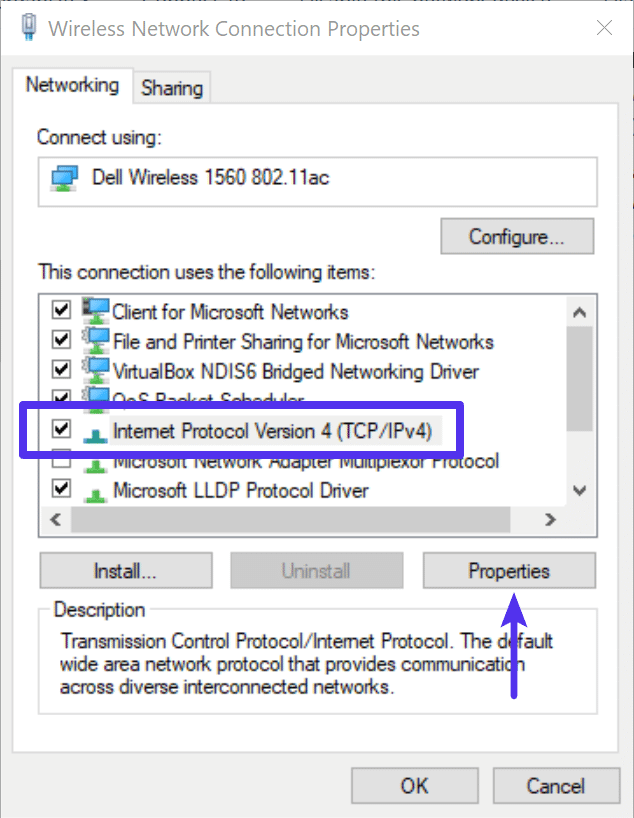
- Right Click on your ‘Connection’ and click on ‘properties’
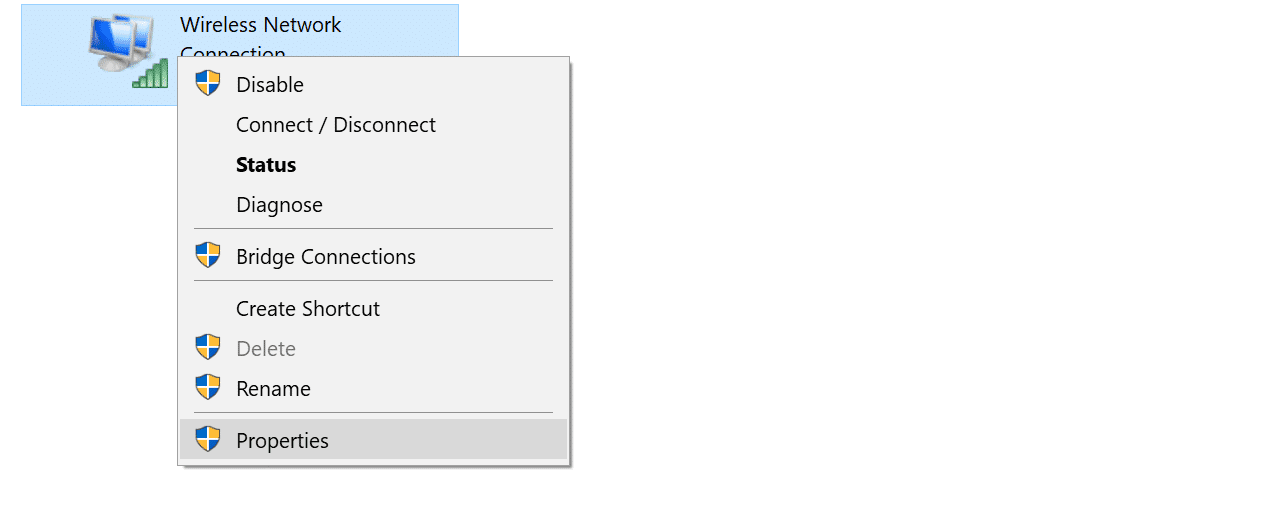
- Then Select the ‘Internet Protocol Version 4 or 6’ and click on ‘Properties’
- Now if you want to revert back and do the changes then Click use the following ‘DNS Server Addresses’
- Then Enter the following:
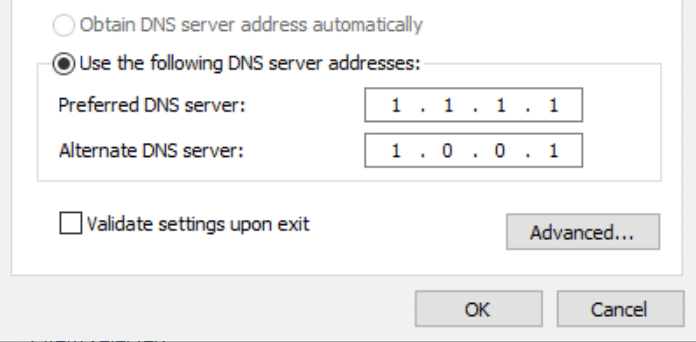
- For IPv4:
1.1.1.1and1.0.0.1 - For IPv6:
2606:4700:4700::1111and2606:4700:4700::1001 - Lastly, click ‘Ok’ and restart your Browser
MAC
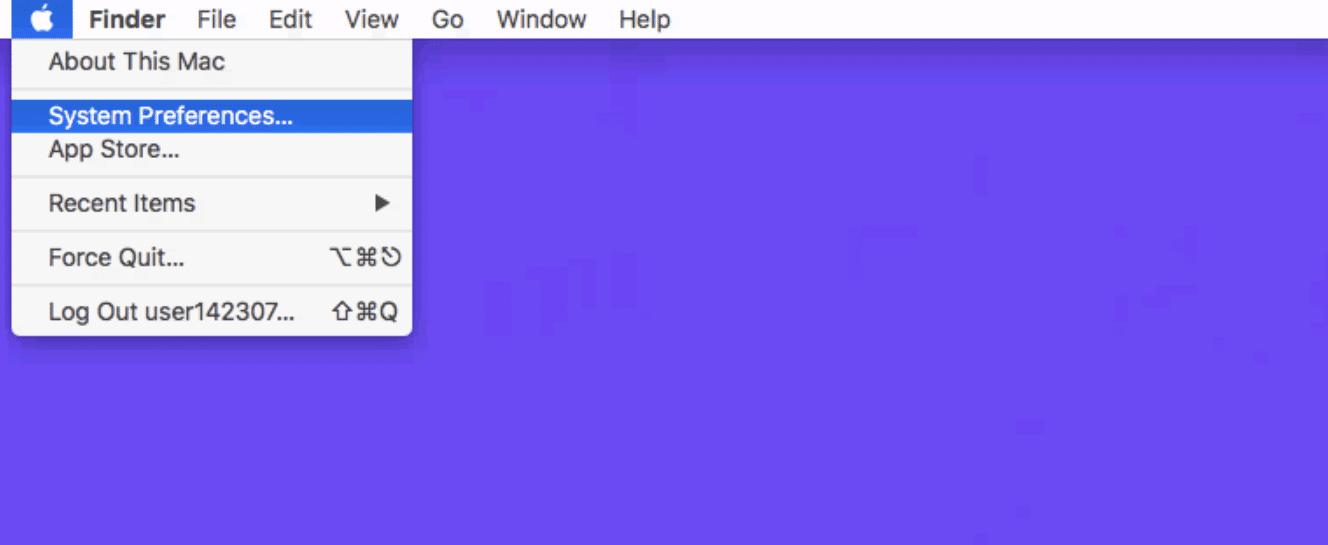
- Go to ‘System preference’
- Click on the ‘Network’ icon and click on ‘Advanced’

- Then click on the ‘DNS’ tab
- Lastly, add the Cloudfare ‘DNS Server address’
- Then Enter the following:
- For IPv4:
1.1.1.1and1.0.0.1 - For IPv6:
2606:4700:4700::1111and2606:4700:4700::1001 - Then click on ‘OK’
3. Reset Chrome Flags
Now and again Chrome settings or exploratory highlights can get switched or failed. You reset these back to default by
- Entering
chrome://flagsinto your program
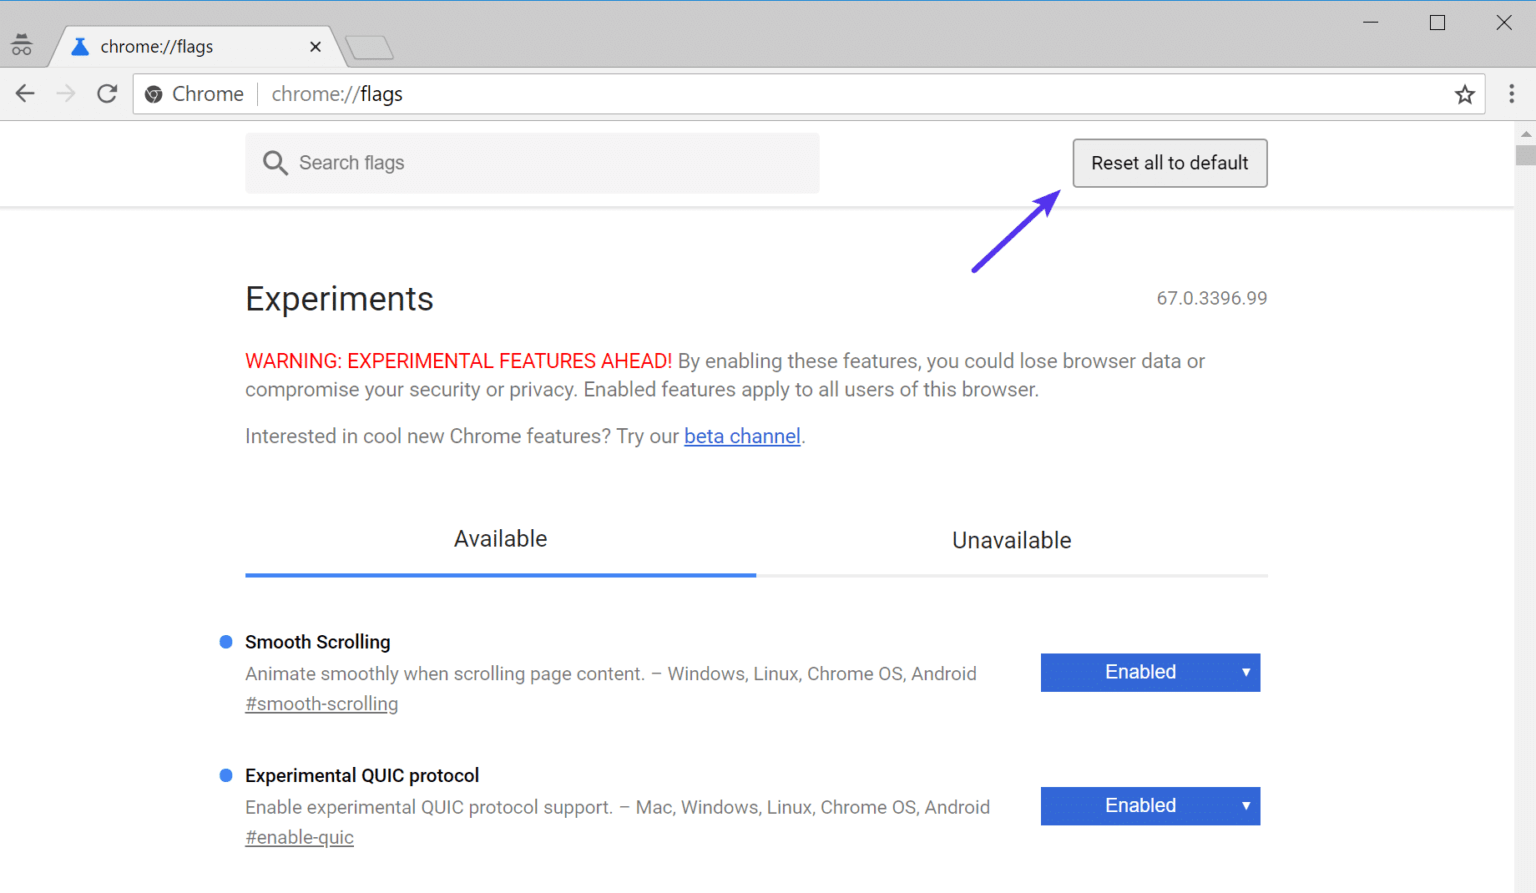
- Lastly tapping on “Reset all to default.”
- Your Chrome Flags will be reset
Conclusion
So I hope this DNS_PROBE_FINISHED_NXDOMAIN Error is solved easily by Resetting your Chrome Flags, Checking your Hosts File and Release and Renew IP address. Also, I hope these 3 Ways has helped you to fix this Error. The above solutions are tried and tested
So if you know any other ways to solve this Error then feel free and write to us in the comment section below to have a chat with us. Thanks for Reading