Camtasia Studio is the best for all beginners or for exports because its interface is wonderful and also it has many features and it can be used for several making videos. Also exporting and sharing videos in Camtasia Studio is easy to use because I have found out a solution by which you can Export And Share your Videos easily without any trouble
However, if you are finding the best password tool to secure all your data then you must read this article on DASHLANE VS Lastpass
So In this article, we’ll focus on How To Export And Share A Project As A Video File In Camtasia Studio. So Let’s get started.
Must Read:
How to Download Shutterstock Images For Free
Whatsapp Manager – Transfer, Recover and backup Data
Steps On How to Export and Share Video in Camtasia Studio
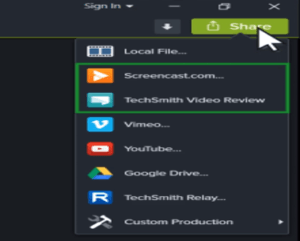
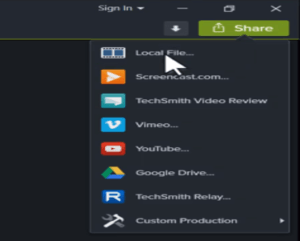
- To export a project, click the Share button
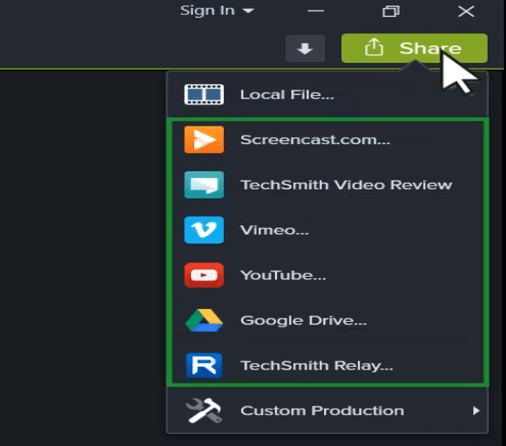
- The first option exports the project as a video file on your computer.
- Select Local File to export as an MP4 and Click next
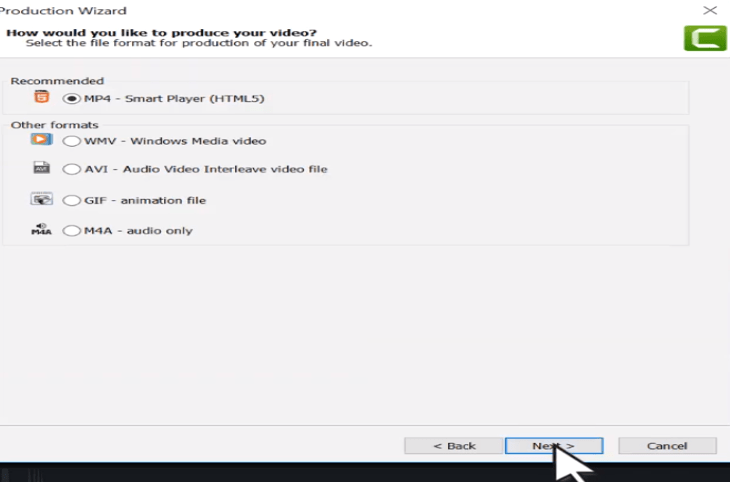
- Select the MP4 option to export in Mp4
 a. First, I recommend you uncheck this box.
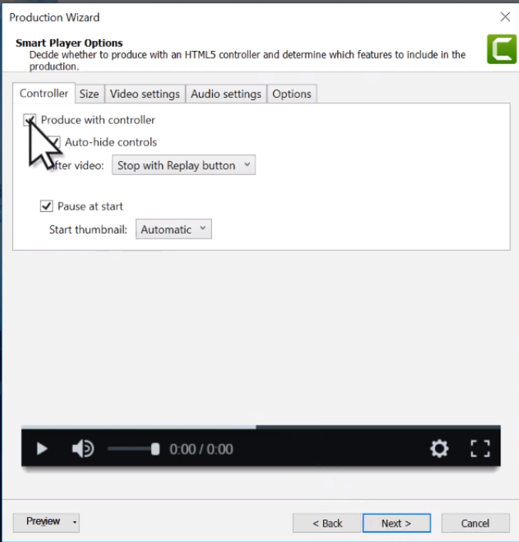
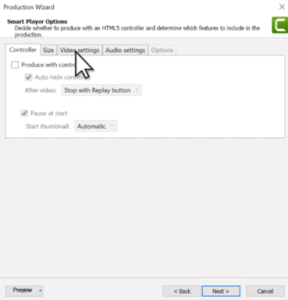
- This option exports the video with our TechSmith Smart player, which is only needed if your project contains quizzes, interactive hotspots or a table of contents.
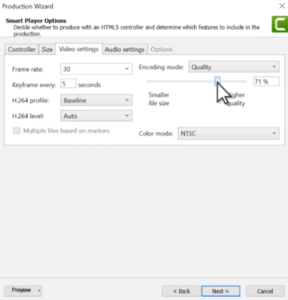
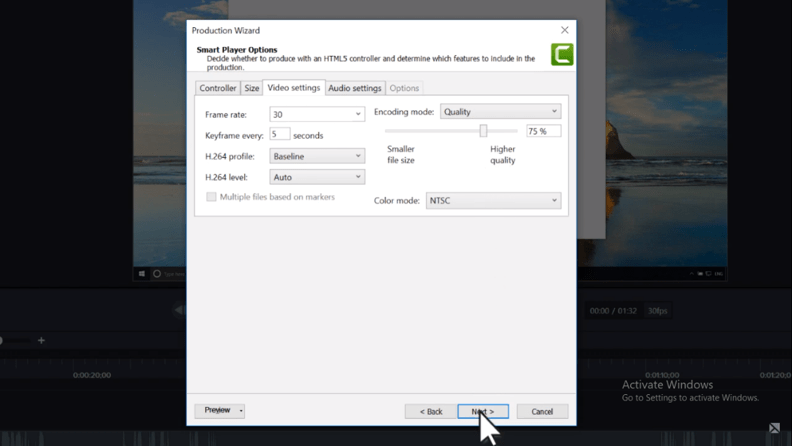
- Next, switch to the Video Settings tab and adjust the slider to increase or decrease the quality of the exported video.
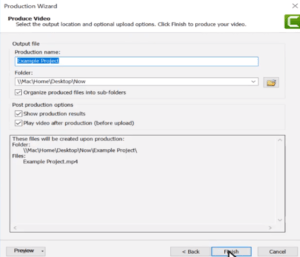
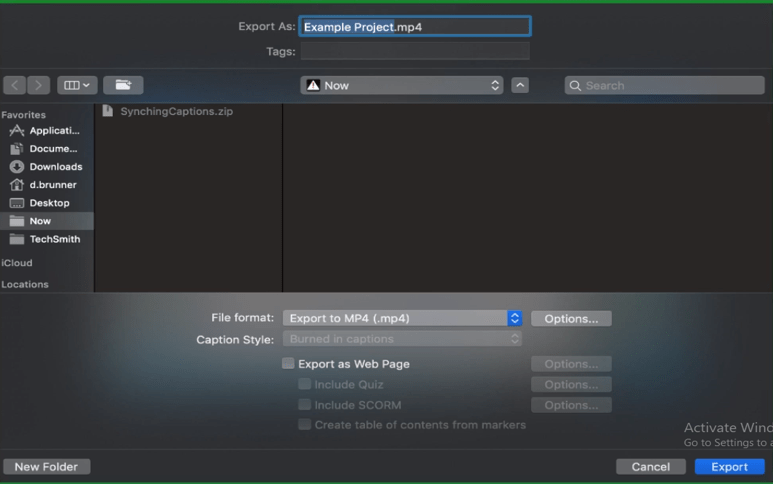
- Click next, read through the options on this page and decide if any apply, then click next again. Here is where you modify the video’s name and choose where to save the video
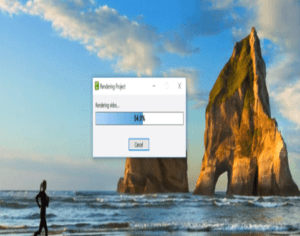
- When ready, click Finish and Camtasia exports the video as an MP4.
- As a final step, when finished with a project, I highly recommend you export it as a zip file. This zips all of the media used in the project into one file, which means the next time you use the project, you have all of the original media
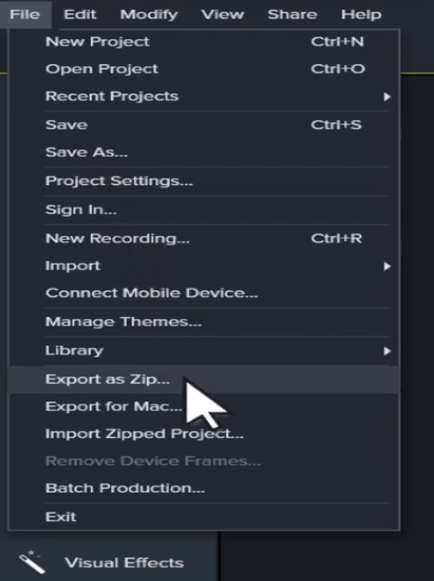
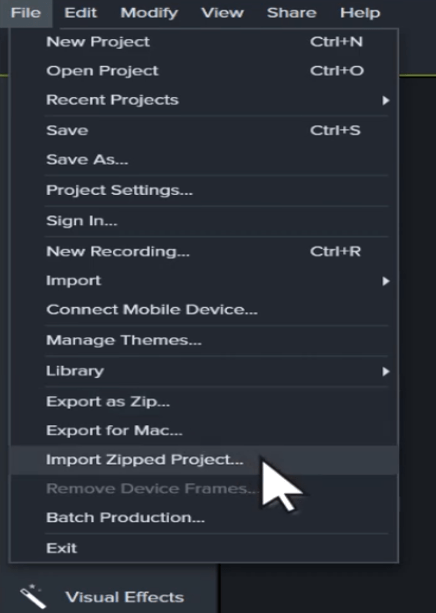
- Inside the zip file are the Camtasia project file, the screen recordings, and any other media used in the project. To use a zipped project, choose Import Zipped Project
- Camtasia exports the video as an MP4. Click “reveal in finder” to open the folder where the video is saved
Also, Read – How to Record, Edit and Share Videos in Camtasia Studio
Export And Share a Project as A Video File For Mac :
To Export and Share a project as a video file for mac follow the below steps
- If you’re on a Mac, the production wizard looks a little different.
- By default, the Export to MP4 option is selected with export settings already optimized for your project.
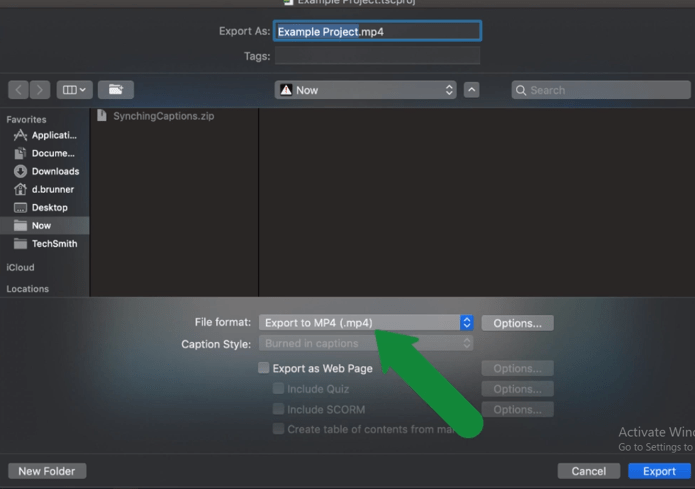
- To customize the export settings, click the Options button.
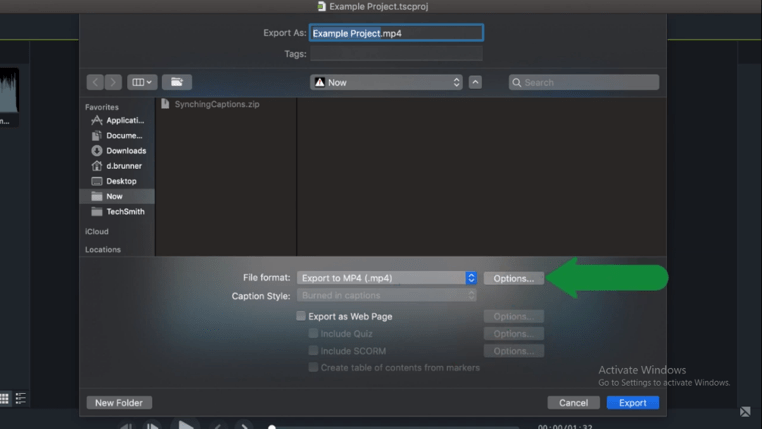
- Then, modify the name, choose where to save the video, then click Export.

Also, read – How to Import Powerpoint Slides in Camtasia Studio?
Important Note :
- Keep in mind that higher quality video means a larger file size
- It’s important to note that in Camtasia for Mac, all media files are contained within the project file, so there’s no need to export the project as a zip file. If you want to know how to install Camtasia Studio then click here for MAC and for Windows
FAQ
- How do I Share a Camtasia File?
- However, in Camtasia Editor, select File > Export for Mac/Windows.
- If you receive a warning about incompatible media in the project, click OK/Continue to continue with the export.
- Name the zipped project and choose a file destination. Windows: Also, Select Include all files from Media Bin in zip.
2. Where are Camtasia Files Stored?
By default, Camtasia automatically names and saves all TREC recordings to the Camtasia folder located here: C:\Users\username\Documents\Camtasia. You can configure Camtasia Recorder to open a Save dialog to enter a file name and location for each TREC recording file after recording.
3. How do I Play Trec Files in Windows?
Camtasia Studio is screen video capture and video editing application for Microsoft Windows. User can define area of the screen, or window as well as full screen that will be recorded to video footage. Camtasia for Mac allows users to create professional videos.
4. What is the Latest Version of Camtasia Studio?
Later versions are named for the year, with Camtasia 2018.0. 0 released on 19 June 2018 and updated until 2018.0. 8 of 7 May 2019, and Camtasia 2019.0. 0 released on 30 April 2019.
5. Is Camtasia a One Time Purchase?
Conclusion :
As going through this article I hope you all have understood How To Export And Share As Project As A Video File In Camtasia Studio. Although Camtasia Studio is easy to use and has a lot of wonderful specifications in it which makes it easier to use. Also if you are a Tiktok user then click here and know more about Tiktok. Also, share this with SHAREit application for faster sharing with your loved ones. I hope you all like this article as I have shown you the simpler steps and Thanks for watching it.