Professionally graded as one of the best software in the video editing lineup, Adobe Premiere CC has too many features and tools that will help you create captivating filming and video experience. The smooth video editor has a lot to offer, and you don’t want to miss on knowing what it can do; let’s dig in the features and a brief yet time worthy review on Adobe Premiere Pro CC.
Adobe Premiere Pro CC is the industry-leading video editor that makes video editing easy for you. Suppose you are a beginner and want to create stunning and professional videos, this the right software. It has a set of unmatched tools and a non-linear video editing interface that are better than most of the top video editing tools on the list.
If you are a beginner in the video industry, such as filming, we don’t recommend Final Cut Pro X because it would make editing complicated. But we do recommend Adobe Premiere Pro CC for its ease of use and powerful tools.
Why use Adobe Premiere Pro CC against all the other top Video editing tools?
Design
If there is anything that Adobe Premiere Pro CC has mastered, it is the responsive design. The well-designed interface and constant updates make sure to hit you with maximum performance and engagement.
Integrations
Communicating with the team is essential when working on a vast project that requires some special attention. Adobe Premiere Pro CC allows integration with other Adobe products such as After Effects and Microsoft Teams, making it possible to communicate without shutting the adobe window.
Multiple Projects
There have been a lot of limitations when it comes to project management on other video editing software. But this is not true on Adobe Premiere Pro, and you get to open multiple projects in the same window and allow ease in project management.
Say No More to Conversions
Earlier, it was difficult to convert raw clips into desired video formats as they gave a good amount of frame loss and distortions. But Adobe Premiere Pro has improved with constant updates and now supports more video formats. So, you still have the desired video format without losing the frames or having distorted video.
High-Quality Video and Audio Editing
Adobe Premiere Pro is great for high-quality video and audio editing and supports real-time content editing. Also, it supports multiple Operating systems gives a world-class performance.
VR Addition
Filming is not the same anymore, and people want to see some virtual reality effects and shots. In such a case, your video editor should be capable of doing so, or your job is at risk. Thanks to the recent updates to Adobe Premiere Pro that supports VR editing and you can do the part seamlessly
Tools and Features of Adobe Premiere Pro CC -
The Timeline Space
When it is about the video editing software, the first eye catchy space is the timeline. Adobe Premiere Pro covers an impactful set of features on the timeline to make video editing easy for you.
Here, you can arrange the videos and audio on different channels and do operations such as split, trim, and moving the clips to make a meaningful story. The timeline is compact, and all the clips are displayed closely; so, you can arrange them without much trouble, and you can use the zoom the size and stretch these clips to make comfortable edits.
The timeline also consists of a huge number of settings and tools to make impressive edits. You can find the sequence settings, audio and video tweaks, and more. Besides, it also supports the drag and drop feature to add media to the timeline effortlessly.
Filters and Transitions
Adobe Premiere Pro CC does have a great set of video filters. You can create cinematic, monochrome, and a few more video styles. Though they are less in number, you can always add external filters from the store and get the desired look on your video.
How to add video filters on Adobe Premiere Pro CC?
- Load a video on your timeline.
- Click on the left effects panel and select the Lumetric Presets folder. These are pre-installed and need no external installation files.
- Select the filter you want to apply on the video, click on it, and you can see the preview of the filter before using it.
- Once you choose your desired filter, drag and drop it on the video to add the filter to the video.
- You can use the keyboard shortcut cmd+z (mac os) and ctrl+z (windows) to remove the filter.
You can use other pre-installed monochrome and video filters folders to access a few more filters from the list.
Transitions are one of the essential elements of video editing. If you are filming long videos that need to have multiple clips joined together, you wouldn’t want a simple cut transition. On Adobe Premiere Pro CC, you have some of the best and most used transitions pre-installed, and all you need to do is drag and drop them. Let me explain it to you clearly,
- Load all your clips on the timeline.
- Click on the effects panel and select the video transition folder from the list.
- You can now find tons of video transition effects such as dissolve, 3D motion, Page speed, wipe, slide, zoom, and more.
- Select a transition and drag the effect on the clips to add them to your video.
- You can adjust the transition duration using the effect control from the top bar.
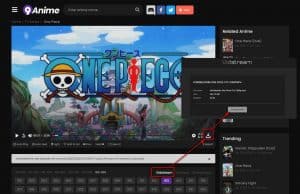
Quick Green Screen Editing on Adobe Premiere Pro
Green screen footage is one of the head tasks for video editors and needs some extra attention. But does Adobe Premiere Pro support Green screen editing? Yes, it does, and it also has a quick green screen editing feature that will take less than 1 minute to edit. Let me tell you how to do it,
- Load your video on the timeline, and then drag the green screen video above the video track you want to use green footage on.
- Now navigate to the effects panel and search for the “ultra key” effect.
- Drag and drop the ultra key effect on the timeline to use the effect.
- Now, select the green screen and head to the effects control panel.
- Choose the color dropper for the key attribute and click anywhere on the screen.
- Green screen editing is done, and you can find a green screen perfectly overlay on the other video.
Adding Text Graphics to Videos
Videos are never complete without adding text graphics, credits, or video titles. But did you know that Adobe Premiere Pro CC has tons of free text graphics that you can add to your video?
- Go to the “Graphics” panel in the top bar.
- Now, you can find the essential graphics section on the right side.
- Select the “Browse” and click on “Adobe Stock”. Make sure to select the “free templates” to get only the free text graphics.
- Now, hover on the graphics from the list to see a preview of text graphics.
- Once you get your desired text graphics, drag them on your timeline window.
- Double click on the text graphics to edit the text.
Quick Tip – Some text and graphics can be heavy for your computer and not be loaded correctly. Select the graphic on your timeline and Hit enter to render the graphics.
Adding audio to your timeline
Adding audio is simple and no rocket science. All you need to do is drag and drop the audio file on the timeline, and you are good to use it.
To optimize the audio file, click on the Settings option on the audio channel. Here, you can refine the audio, change the DB and tweak a few more audio settings.
On Adobe Premiere Pro, you can also record the audio directly on the timeline without using other audio recording software. Click on the mic button, and the recording should start but make sure you have a good mic to record and get the best audio experience. You can also tweak some audio settings to optimize the audio and use the split, trim, and adjustment tool to adjust the audio according to the video on the timeline and avoid mismatch.
Exporting a video in Adobe Premiere Pro CC
Once you are done with the video editing part, you need to optimize the export settings to get the desired video output quality, resolution, and file type. You can use Ctrl+M on Windows or CMD+M keyboard shortcut to open the export media option.
You can use the Match sequence setting to keep the existing video settings or configure it manually. For manual configuration, the first step you need to do is select the media type file format. You can also use the preset to choose what platform you will be exporting the video on, such as YouTube, Facebook, Vimeo, and more. This will help you with adjusting the resolution and quality of the video.
The last step is to fine-tune the video settings such as aspect ratio and adjust the bitrate and rendering quality. Select the directory and folder to export the video, and then click on export.
Do Adobe Premiere Pro CC support stock footage, graphics, and images?
Yes, Adobe Premiere Pro CC does support stock resources, and there are free options too.
You can check the essentials library for stock graphics, texts or get images and footage from the Adobe stock website.
Compatibility and System Requirements
If you wish to use Adobe Premiere Pro on your computer or laptop, it is essential to know if you have all the requirements fulfilled. It is better to have a check at this section before buying the subscription to this software; your laptop may or may not be supporting it.
Recent Posts
That said, adobe premiere pro cc minimum requirements for system are as follows:
Windows OS
Processor
- Minimum Specification – Intel 6th Gen or Newer CPU – or AMD Ryzen 1000 series or newer CPU.
- Recommended Specification – Intel 7th Gen or Newer CPU – or AMD Ryzen 3000 series or newer CPU.
- Operating System
- Minimum Specification – Microsoft Windows 10 (64-bit) version 1803 or later.
- Recommended Specification – Microsoft Windows 10 (64-bit) version 1809 or later.
RAM
- Minimum required RAM – 8GB
- Recommended required RAM – 16GB of RAM for HD media and 32GB for 4K media
GPU
- Minimum GPU vRAM requirement – 2GB
- Recommended GPU vRAM requirement – 4GB
- Hard Disk Space
- Minimum Hard Disk Space – 8GB HDD of free space for installation
- Recommended Space – SSD for faster usage and speed, and additional speed drives for media.
Monitor Resolution
- Minimum monitor resolution – 1280×800
- Recommended monitor resolution – 1920×1080 or higher
Sound Card
- Minimum specification – ASIO compatible or Microsoft Windows driver model
- Recommended specification – ASIO compatible or Microsoft Windows Driver Mode
Network Storage Connection
- Minimum requirement- 1Gigabit for Ethernet (HD Only)
- Recommended requirement – 10 Gigabit for 4K shared network workflow
Hardware-accelerated H.264 encoding
- Windows 10 with 6th Generation (or later) Intel® Core™ processors and Intel Graphics enabled
- Windows 10 with a supported NVIDIA or AMD card
Hardware-accelerated HEVC encoding
- Windows 10 with 7th Generation (or later) Intel® Core™ processors and Intel Graphics enabled
- Windows 10 with a supported NVIDIA or AMD card
Hardware-accelerated H.264 decoding
- Windows 10 with 6th Generation (or later) Intel® Core™ processors and Intel Graphics enabled
Hardware-accelerated HEVC decoding
- Windows 10 with 7th Generation (or later) Intel® Core™ processors and Intel Graphics enabled
We find some limitations on OS specifications for Adobe Premiere Pro CC. The software is only usable on Windows 10 operating system, and if you have anything else, you cannot install the software.This restricts the users and forces them to update to Windows 10 while most of the users worldwide are still using the Windows 7 and Windows 8.1 OS.
The reason for this restriction is because Adobe is constantly updating for advanced tools and features to give its users the best video editing experience, and this is not possible on outdated Operating Systems.
Another limit we encountered is the RAM capacity. Most of the video editors who cannot afford such high-tech specifications will suffer from a lot of lagging and trouble using the video editing software. We would love if Adobe Premiere Pro could come with a lite version for such users, but it will give the major feature limitations that users won’t love.
Mac OS
Processor
- Minimum Specification – Intel 6th Gen or newer CPU
- Recommended Specification – Intel 6th Gen or newer CPU
Operating System
- Minimum OS requirement – macOS v10.14 or later
- Recommended Specification – macOS v10.14 or later
RAM
- Minimum RAM requirement – 8GB
- Recommended RAM requirement – 16GB for HD video and 32GB for 4K and higher
GPU
- Minimum GPU vRAM specification – 2GB
- Recommended GPU vRAM specification – 4GB
Hard Disk Space
- Minimum space required – 8GB for installation and additional space for dynamic installation files.
- Recommended space requirement – Fast internal SSD and additional speed drives for smooth storage operations.
Monitor Resolution
- Minimum monitor resolution – 1280×800
- Recommended monitor resolution – 1920×1080 or higher
Hardware-accelerated H.264 encoding
- macOS 10.13 (or later) on Mac hardware from 2016 or later
Hardware-accelerated HEVC encoding
- macOS 10.13 (or later) on Mac hardware from 2016 or later
Hardware-accelerated H.264 decoding
- macOS 10.13 (or later) on Mac hardware from 2016 or later
Hardware-accelerated HEVC decoding
- macOS 10.13 (or later) on Mac hardware from 2016 or later
Can you Install Adobe Premiere Pro on Removable Flash Drive?
No, you cannot install Adobe Premiere Pro on removable flash on the Windows Operating system. You need to have the free space on your laptop or desktop’s storage drive to install the Adobe Premiere Pro CC.
On the other hand, if you are a mac user, you cannot install the Adobe Premiere pro in volume, consisting of sensitive files. In addition to this, you also cannot install Adobe Premiere Pro on removable flash drives. That’s a limitation.
Pricing
There are Four plans for users to choose from when buying an Adobe Premiere Pro CC subscription.
Individual Plan
- Price – $29.99/Month, $239.88/Year,
- $19.99/Mo (Annual Subscription)
- Latest Adobe Premiere Pro CC Version
- 100 GB Storage
- Adobe tools – Premiere Rush, Adobe Portfolio, Adobe Fonts, and Adobe Spark
Business Plan
- You get two options; 1. Buy All apps ($79.99/Mo per license) 2. Single App ($33.99/Mo per license)
- Latest Adobe software
- 100 GB Storage
Students and Teachers Plan
- All Apps ($19.99/Mo) for the first year then $29.99/Mo.
- The entire collection of 20+ Adobe apps
- Own portfolio website to showcase work
- Apps to create and share photos, videos, and graphics.
Schools and Universities Plans
- Per-Named user license ($34.99/Mo per user – All apps)
- Per shared devices ($330.00/year per device – All apps)
- Per student pack ($142.00/year per user – All apps)
- Institution-wide pack (Customisable)
Pros and Cons
Pros -
- Interactive and friendly interface
- Excellent stabilization
- A robust set of tools
- High-quality video and audio editing
- Support a great collection of export file formats.
- Built-in non-linear video editing
Cons -
- Need the latest hardware and software requirements
- Resource intensive
- Cannot install on removable flash drives and sensitive file systems on Mac OS.
- Free trial for 30 days
Final Verdict
Overall, Adobe Premiere Pro CC is a professionally graded video editing software and fulfills all the video editor requirements. If you are a beginner, you will find professional video editing easy and effortless on Adobe Premiere Pro. Scale your video editing seamlessly with pre-installed filters, transitions, and video effects.
The pricing structure is very simple & user friendly, it has 4 different plans to choose from as per the need! They are :
- Individual Plan
- Business Plan
- Students & Teachers Plans
- Schools & Universities Plan
Yes, Adobe Premiere Pro CC provides 30 days free trail.
The minimum requirement for Mac operating system is macOS v10.14 or later.
For reading more on such informative topics, click here